Youmai の Blog


  • 首页

  • 分类

  • 关于

  • 归档

  • 标签

[解决]mac删除系统自带python后一些软件崩溃

发表于 2015-05-26 | 分类于 mac

mac 10.10.3自带的python版本是2.6,而2.0版本现在已经不再更新,最终版是2.7.9。很多同学都会给mac装上最新版本来代替系统自带版本。有一些教程还好,会让你保存2.6。有一些就糟糕了,它会让你直接用2.7(或者3.4)来覆盖2.6。这样在终端中是没有问题的,但是有一些应用程序,比如iPhoto和sublime,它们依赖于系统的2.6,一旦找不到2.6的版本,打开软件就会崩溃。其实问题是很简单的,网上有一些答案,这里讲一下我的解决方法。

首先,你需要找到你的新版的python的安装路径
系统默认的是在

/System/Library/Frameworks/Python.framework/Versions/2.7

如果你是用homebrew安装的python,那么应该在

/usr/local/Cellar/python/2.7.9/Frameworks/Python.framework/Versions/2.7/

我们不需要再安装2.6的版本,只需要创建一个软链接即可:

sudo ln -s /usr/local/Cellar/python/2.7.9/Frameworks/Python.framework/Versions/2.7/ /System/Library/Frameworks/Python.framework/Versions/2.6

第一个路径即是你的python的安装路径

PS1:
如果你打开软件显示*** import error,那是说明你的这个版本没有安装这个模块,pip安装即可。

PS2:
如果需要使用新版的python,还是建议大家使用pyenv,既能安装多个版本又不会搞乱系统,非常NB。

##参考资料

Ask Different –Iphoto and Python2.6

使用traceback追踪异常

发表于 2015-05-25 | 分类于 python

调试代码的时候,简单的try—except语句只能告诉我们哪里出了错,但是错误的根源可能在多个函数之前,所以我们有必要知道出现错误时的堆栈情况。python提供了traceback模块来帮助我们打印堆栈。

一般来说程序都是将信息写入log,所以这里以写入log为例

import class
import logging

if __name__=="__main__":
    logging.basicConfig(filename='trace.log')
    try:
        excep_class.except_fun(excep_args)
    except:
        s=traceback.format_exc()
        logging.error(s)

这样就可以打印出程序发生异常时,堆栈的信息。

---Traceback (most recent call last):
  File "/usr/lib/python2.7/dist-packages/keystoneclient/middleware/auth_token.py", line 578, in __call__
    token_info = self._validate_user_token(user_token, env)
  File "/usr/lib/python2.7/dist-packages/keystoneclient/middleware/auth_token.py", line 838, in _validate_user_token
    raise InvalidUserToken('Token authorization failed')
InvalidUserToken: Token authorization failed

这里是一段出错信息,可以明显地看出,最上面的是最早调用的函数,上面的函数调用下面的函数,最后一个是最终出错的地方。

Django国际化遇到的神坑

发表于 2015-05-22 | 分类于 Django

配置完全是按照文档来,检查了一遍又一遍。来回地创建po,mo文件,可是web就是不显示中文,Django你坏了还是我坏了?

django国际化的问题纠缠了我5个小时,我从没有如此痛苦过,因为我很清楚这是一个很小的问题,但是因为没法调试,没有log,我根本不知道问题出在哪里。谁能TMD知道不能用-啊,草泥马!!!

解决方案:

语言包不要有-,例如语言包是zh-hans, 请将其改成zh_hans,其他地方的zh-hans不需要修改。

如果说这也能称为知识的话,我真是日了狗了。

django现在对zh-cn, zh-CN都不支持了,用了这些的话Django会提醒你:

The use of the language code 'zh-cn' is deprecated. Please use the 'zh-hans' translation instead.

其实直接用zh也可以,而且,他还会主动到zh_hans的语言包里去找它里面没有翻译的内容。虽然我很想赞叹一声,但是竟然要这样区分-和_,我也是醉了。

切记切记,语言包的名称中不要有-!!!

搬家后手机地图定位仍在原来的地方--Google WiFi定位的原理

发表于 2015-05-20 | 分类于 长知识

前几天刚搬家,到了新家拿出手机,却发现手机地图的定位还是在原来的地方,怎么重新定位都不准确。过了两天却又好了,我以为是正常的延迟或者误差,就没把这事放在心上。今天看到了这篇文章终于恍然大悟,不禁感叹,生活处处是学问啊!

原文是一位台湾同行写的,是繁体字,我改成了简体贴在这里与大家共享,原文在这里


以前我不了解Google WiFi 定位时,一直对这技术嗤之以鼻,我想说从IP Address 哪里能定位到很精准,最多就是从一些公开的IP to GEO 资料库可以查询到这个IP 是在那个城市,是没办法精准定位的。

可是随着我发现没有GPS 卫星定位功能的iPod Touch 在打开WiFi 的情况下竟然可以在Google 地图上精准到我所在地的附近,这就引起了我很大的好奇心,到底这是怎么做到的?显然不可能是靠IP Address 去查询啊?

看了一些简体与繁体的文件,实在是觉得扯太远扯太多,还是没看到精髓处,所以直接从英文去查吧!果然查到了不少资料,也就了解Google WiFi 定位的原理了。在这之前先把几个名词给解释一下。

GPS卫星定位:靠的是环绕在地球四周的数颗卫星发送讯号到地面,交叉连集出所在地的方法。从十几年前开始出现汽车导航产品,就是使用这种技术。初次定位时常要花上一分钟以上的时间,这也是目前汽车导航和智慧型手机都有提供的定位方式。当有遮蔽物阻挡来自天空的讯号时就会发生定位的困难。

A-GPS定位:靠着事先下载星历资料,能够加速上述GPS定位的初次定位速度。由于一般车用导航机都不具备网路连线能力因此无法事先下载星历资料,所以也都不具备A-GPS定位。

手机基地台定位:靠的是侦测到的手机基地台(Cell Tower),比对资料库以及信号强度,交叉连集出所在地的方法。也因为要能够侦测手机基地台,所以一般车用导航机因不具备手机电话能力而无法 提供,几乎可以说手机基地台定位是智慧型手机或者能够插手机SIM卡的平板电脑才可以提供的功能。此法尚须有网路连线做资料库查询才能完成定位。

附近手机基地台真多啊

WIFI定位:靠的是侦测附近周围所有的无线网路基地台(无线接入点)的MAC地址(类似10-78-D2-93-58-C2这样的格式),去比对资料库中该MAC地址的座標,交叉連集出所在地。此法尚須有網路連線做資料庫查詢才能完成定位。

所以问题来了:这份无线网路基地台MAC地址对应到经纬度的资料库,是怎么建立起来的呢?

基础建设靠的是谷歌街景车。谷歌街景车除了拍下街景以外,另外还做了两件事情(信息来源:google blog):

沿路搜集所有公开的无线网路MAC地址,与当时的经纬度一并记录。
根据拍下的街景来建立建筑物的3D模型资料。

此效果截至本文刊出时仅能在谷歌Android手机上看到

但資料庫一定會面臨過期與需要更新的問題,這時候全世界有在使用行動裝置谷歌+定位程式的人,等于是在不知不觉中帮忙做这件事情。更新的方法是当无线网络与手机基地台定位或GPS定位同时开启时,手持装置藉由手机基地台定位或GPS定位这两种方式可以获得目前的座标,再透过无线网络搜寻到附近所有的MAC地址,背后向谷歌的资料库做更新。(信息来源:谷歌员工克里斯托弗的公开说法)

說穿了技術其實不難,但這麼龐大的資料庫,又能夠不痛不癢的號召每個行動裝置幫忙更新維護這份資料庫,大概也只有谷歌做得来了。

知道了原理之后,衍生出来的就是一些隐私权的问题。

首先就是谷歌搜集无线网络的MAC地址资讯合法吗?德国政府去年对此提出疑虑,而谷歌认为合法,两造后来怎么样了我懒得去追,反正从技术上来看,MAC地址在網路上要能夠被查詢到,那麼你與對方之間不能有路由器存在,一旦過了路由器那麼原始MAC地址就會被替換(詳細的原理這邊就不多說了),所以一般人雖然可以用很多方法去找出對方的IP地址,但对方的MAC地址就没办法了,中间经过的路由器太多啦!也就无法利用MAC地址去查對方身處何處。除非將木馬植入對方電腦來回報,且對方有在使用無線網路而且他附近的無線網路基地台有被登記到谷歌資料庫中,那才有機會找到對方所在地附近,但這難度又高條件又多,對警察來說還是用IP地址行文法院与电信业者来找精确的地址最快。

所以回头来说隐私权,我个人觉得应该是不会,且无线网络的MAC地址是屬於公開資訊,並非刻意用什麼非法手段才能取得。一般人就算探測到你的MAC地址,也不晓得你是谁或什么人在使用。

再来就是定位错误的问题。

搬家后其无线网路基地台也跟着移动,那么以无线网络定位來看自己身在何處,可能會呈現仍然在上一個住所的問題。針對這種因為資料庫尚未被更新而產生的定位錯誤問題,Google提供了一个无线网路定位错误的表格来申请回报,但一如一般谷歌的服務一樣,這表格並不能保證立即得到回應。想要加速更新資料庫,除了填寫這份表格以外,另外就是自己時常拿行動裝置開著无线+ GPS定位吧,这是刚才提过的资料库更新法,总有一天谷歌会因为你与行动装置的努力而修正过来的。😛

回头看我一开始以为谷歌的WiFi定位是靠着IP地址来定位,真是大错特错了啊!谷歌要的只是侦测到无线基地台的MAC地址就可以,也没有强调一定要与无线基地台连线,只要打开行动装置的无线网络功能,让谷歌定位可以藉由无线去搜集附近可侦测的MAC地址,接着透过3G行动上网或此时你真的有无线网络连线,就可以去向谷歌资料库查询这些MAC地址连集起来的可能位置,就这样完成定位了。

[翻译]python招聘指南

发表于 2015-05-19 | 分类于 python

原文在这里toptal

##python专家or Snake in the Grass?

你已经发现什么样的表现是一个python高手。但是在你该如何确定你的top 1%精英候选者也是呢?尽管没有魔法或者万无一失的技术,但是确实有一些问题可以帮助你确定候选者对这门语言认识的深度。下面简要地列举了一些这样的问题。

重要的是,这些样题仅仅旨在作为指导。不是所有的值得招聘的“A”级候选人都能正确地回答所有这些问题。同样,能正确回答所有问题也不能保证他/她就是一个“A”级候选人。招聘是一门科学,同样也是一门艺术。

##杂草中的蟒蛇…

尽管确实最优秀的开发者不会浪费时间记住一些能轻易在语言手册或者API文档中找到的知识,但是,仍然有一些关键的特性和能力,任何编程语言的每个专家都能,并且应该
精通。这里就是一些python特定的例子。

###Q:为什么要用函数装饰器?请举例

装饰器本质上是用来修改,扩展函数或类定义的可调用Python对象。装饰器的一个美丽之处是,单个装饰器定义可作用于多种函数(或类)。大部分功能从而可以用装饰器实现,否则将需要大量的样板(或更糟多余的!)代码。例如Flask,使用装饰器的机制来添加新的端点到web应用程序。一些装饰器的更常见的用途包括:增加同步,类型强制执行,日志,或前/后条件到一个类或函数。

###Q:什么是lambda表达式,列表解析和生成器表达式?各有什么优势和适当的用途?

lambda表达式是一种快速创建单行匿名函数的方法。它的简单,内联的本质往往-虽然不是总是-可以让代码比用正常函数定义方法更加可读和简洁。但另一方面,它的内联本质也极大地限制了它能做的事情。Being anonymous and inline, the only way to use the same lambda function in multiple locations in your code is to specify it redundantly.

List comprehensions provide a concise syntax for creating lists. List comprehensions are commonly used to make lists where each element is the result of some operation(s) applied to each member of another sequence or iterable. They can also be used to create a subsequence of those elements whose members satisfy a certain condition. In Python, list comprehensions provide an alternative to using the built-in map() and filter() functions.

As the applied usage of lambda expressions and list comprehensions can overlap, opinions vary widely as to when and where to use one vs. the other. One point to bear in mind, though, is that a list comprehension executes somewhat faster than a comparable solution using map and lambda (some quick tests yielded a performance difference of roughly 10%). This is because calling a lambda function creates a new stack frame while the expression in the list comprehension is evaluated without doing so.

Generator expressions are syntactically and functionally similar to list comprehensions but there are some fairly significant differences between the ways the two operate and, accordingly, when each should be used. In a nutshell, iterating over a generator expression or list comprehension will essentially do the same thing, but the list comprehension will create the entire list in memory first while the generator expression will create the items on the fly as needed. Generator expressions can therefore be used for very large (and even infinite) sequences and their lazy (i.e., on demand) generation of values results in improved performance and lower memory usage. It is worth noting, though, that the standard Python list methods can be used on the result of a list comprehension, but not directly on that of a generator expression.

###Q:考虑下面初始化列表的两种方法和产生的列表。所产生的列表将如何不同,为什么要使用这一初始化方法而不是另一个?

>>> # INITIALIZING AN ARRAY -- METHOD 1
...
>>> x = [[1,2,3,4]] * 3
>>> x
[[1, 2, 3, 4], [1, 2, 3, 4], [1, 2, 3, 4]]
>>>
>>>
>>> # INITIALIZING AN ARRAY -- METHOD 2
...
>>> y = [[1,2,3,4] for _ in range(3)]
>>> y
[[1, 2, 3, 4], [1, 2, 3, 4], [1, 2, 3, 4]]
>>>
>>> # WHICH METHOD SHOULD YOU USE AND WHY?

虽然这两种方法乍一看产生的结果相同,但两者之间的差异极其显著。如你所料,方法2产生有3个元素的列表,每个元素本身就是一个独立的4元素的列表。然而,在方法1中,列表的元素(4元素列表)都指向同一个对象。这会导致我们最始料未及和最不希望的行为,如下所示。

>>> # MODIFYING THE x ARRAY FROM THE PRIOR CODE SNIPPET:
>>> x[0][3] = 99
>>> x
[[1, 2, 3, 99], [1, 2, 3, 99], [1, 2, 3, 99]]
>>> # UH-OH, DON’T THINK YOU WANTED THAT TO HAPPEN!
...
>>>
>>> # MODIFYING THE y ARRAY FROM THE PRIOR CODE SNIPPET:
>>> y[0][3] = 99
>>> y
[[1, 2, 3, 99], [1, 2, 3, 4], [1, 2, 3, 4]]
>>> # THAT’S MORE LIKE WHAT YOU EXPECTED!
...

###Q: 下面的第二个append()语句输出什么?

>>> def append(list=[]):
...     # append the length of a list to the list
...     list.append(len(list))
...     return list
...
>>> append(['a','b'])
['a', 'b', 2]
>>>
>>> append()  # calling with no arg uses default list value of []
[0]
>>>
>>> append()  # but what happens when we AGAIN call append with no arg?

如果一个函数参数的默认值是一个表达式,这个表达式仅被执行一次,而不是每次这个函数被调用都被执行。因此,一旦列表参数已经被初始化为了一个空列表,后续调用append函数时,如果不指定参数list,将会继续使用之前初始化的同一个列表。这会引起下面的意外行为:

>>> append()  # first call with no arg uses default list value of []
[0]
>>> append()  # but then look what happens...
[0, 1]
>>> append()  # successive calls keep extending the same default list!
[0, 1, 2]
>>> append()  # and so on, and so on, and so on...
[0, 1, 2, 3]

###Q:在上述问题中,如何修改append方法的实现来避免描述的不当行为?

下面的append方法的替代实现是避免上述问题答案描述的不当行为的一个方法:

>>> def append(list=None):
...     if list is None:
            list = []
        # append the length of a list to the list
...     list.append(len(list))
...     return list
...
>>> append()
[0]
>>> append()
[0]

###Q:如何用一行python代码交换两个变量的值?

考虑这个简单的例子:

>>> x = 'X'
>>> y = 'Y'

在很多语言中,交换x和y的值需要你进行以下的操作:

>>> tmp = x
>>> x = y
>>> y = tmp
>>> x, y
('Y', 'X')

但是在python中,你可以用一行代码完成swap功能(感谢元组隐式的打包和解包)

>>> x,y = y,x
>>> x,y
('Y', 'X')

###Q:下面代码中最后一个表达式的输出是什么?

>>> flist = []
>>> for i in range(3):
...     flist.append(lambda: i)
...
>>> [f() for f in flist]   # what will this print out?

在Python的闭包中,变量都是通过名字来绑定。因此,上面代码的输出如下:

[2, 2, 2]

可能并不是代码的作者预料的结果!

一个替代方法是:可以创建一个独立的函数,或者通过名字传递参数;比如:

>>> flist = []
>>> for i in range(3):
...     flist.append(lambda i = i : i)
...
>>> [f() for f in flist]
[0, 1, 2]

###Q: Python2和3之间的主要区别是什么?

尽管Python2现在被认为是遗留之物,但是对一个开发者来说,因为Python2使用广泛,知道Python2和Python3之间的区别是非常重要的。

这里是开发者应该了解的一些关键差异:

Text and Data instead of Unicode and 8-bit strings. Python 3.0 uses the concepts of text and (binary) data instead of Unicode strings and 8-bit strings. The biggest ramification of this is that any attempt to mix text and data in Python 3.0 raises a TypeError (to combine the two safely, you must decode bytes or encode Unicode, but you need to know the proper encoding, e.g. UTF-8)

This addresses a longstanding pitfall for naïve Python programmers. In Python 2, mixing Unicode and 8-bit data would work if the string happened to contain only 7-bit (ASCII) bytes, but you would get UnicodeDecodeError if it contained non-ASCII values. Moreover, the exception would happen at the combination point, not at the point at which the non-ASCII characters were put into the str object. This behavior was a common source of confusion and consternation for neophyte Python programmers.

print函数. print表达式已经被一个print()函数替代

xrange – buh-bye. xrange()不再存在(range()现在的效果和xrange()一样,except it works with values of arbitrary size)

API changes:

  • zip(), map() and filter() all now return iterators instead of lists

  • dict.keys(), dict.items() and dict.values() now return “views” instead of lists

  • dict.iterkeys(), dict.iteritems() and dict.itervalues() are no longer supported

  • Comparison operators. The ordering comparison operators (<, <=, >=, >) now raise a TypeError exception when the operands don’t have a meaningful natural ordering. Some examples of the ramifications of this include:

Expressions like 1 < ‘’, 0 > None or len <= len are no longer valid
None < None now raises a TypeError instead of returning False

  • Sorting a heterogeneous list no longer makes sense – all the elements must be comparable to each other

更多关于Python2和Python3的区别可以参考这里。

###Q: Python是解释型的还是编译型的?

As noted in Why Are There So Many Pythons?, this is, frankly, a bit of a trick question in that it is malformed. Python itself is nothing more than an interface definition (as is true with any language specification) of which there are multiple implementations. Accordingly, the question of whether “Python” is interpreted or compiled does not apply to the Python language itself; rather, it applies to each specific implementation of the Python specification.

Further complicating the answer to this question is the fact that, in the case of CPython (the most common Python implementation), the answer really is “sort of both”. Specifically, with CPython, code is first compiled and then interpreted. More precisely, it is not precompiled to native machine code, but rather to bytecode. While machine code is certainly faster, bytecode is more portable and secure. The bytecode is then interpreted in the case of CPython (or both interpreted and compiled to optimized machine code at runtime in the case of PyPy).

###Q: 有哪些CPython的替代实现?什么时候,为什么会使用他们?

One of the more prominent alternative implementations is Jython, a Python implementation written in Java that utilizes the Java Virtual Machine (JVM). While CPython produces bytecode to run on the CPython VM, Jython produces Java bytecode to run on the JVM.

Another is IronPython, written in C# and targeting the .NET stack. IronPython runs on Microsoft’s Common Language Runtime (CLR).

As also pointed out in Why Are There So Many Pythons?, it is entirely possible to survive without ever touching a non-CPython implementation of Python, but there are advantages to be had from switching, most of which are dependent on your technology stack.

Another noteworthy alternative implementation is PyPy whose key features include:

Speed. Thanks to its Just-in-Time (JIT) compiler, Python programs often run faster on PyPy.

Memory usage. Large, memory-hungry Python programs might end up taking less space with PyPy than they do in CPython.

Compatibility. PyPy is highly compatible with existing python code. It supports cffi and can run popular Python libraries like Twisted and Django.

Sandboxing. PyPy provides the ability to run untrusted code in a fully secure way.

Stackless mode. PyPy comes by default with support for stackless mode, providing micro-threads for massive concurrency.

###Q: What’s your approach to unit testing in Python?

The most fundamental answer to this question centers around Python’s unittest testing framework. Basically, if a candidate doesn’t mention unittest when answering this question, that should be a huge red flag.

unittest supports test automation, sharing of setup and shutdown code for tests, aggregation of tests into collections, and independence of the tests from the reporting framework. The unittest module provides classes that make it easy to support these qualities for a set of tests.

Assuming that the candidate does mention unittest (if they don’t, you may just want to end the interview right then and there!), you should also ask them to describe the key elements of the unittest framework; namely, test fixtures, test cases, test suites and test runners.

A more recent addition to the unittest framework is mock. mock allows you to replace parts of your system under test with mock objects and make assertions about how they are to be used. mock is now part of the Python standard library, available as unittest.mock in Python 3.3 onwards.

The value and power of mock are well explained in An Introduction to Mocking in Python. As noted therein, system calls are prime candidates for mocking: whether writing a script to eject a CD drive, a web server which removes antiquated cache files from /tmp, or a socket server which binds to a TCP port, these calls all feature undesired side-effects in the context of unit tests. Similarly, keeping your unit-tests efficient and performant means keeping as much “slow code” as possible out of the automated test runs, namely filesystem and network access.


####[注意:这个问题针对的是同样有java开发经验的python开发者.]

###Q: What are some key differences to bear in mind when coding in Python vs. Java?

Disclaimer #1. The differences between Java and Python are numerous and would likely be a topic worthy of its own (lengthy) post. Below is just a brief sampling of some key differences between the two languages.

Disclaimer #2. The intent here is not to launch into a religious battle over the merits of Python vs. Java (as much fun as that might be!). Rather, the question is really just geared at seeing how well the developer understands some practical differences between the two languages. The list below therefore deliberately avoids discussing the arguable advantages of Python over Java from a programming productivity perspective.

With the above two disclaimers in mind, here is a sampling of some key differences to bear in mind when coding in Python vs. Java:

Dynamic vs static typing. One of the biggest differences between the two languages is that Java is restricted to static typing whereas Python supports dynamic typing of variables.

Static vs. class methods. A static method in Java does not translate to a Python class method.

In Python, calling a class method involves an additional memory allocation that calling a static method or function does not.

In Java, dotted names (e.g., foo.bar.method) are looked up by the compiler, so at runtime it really doesn’t matter how many of them you have. In Python, however, the lookups occur at runtime, so “each dot counts”.

Method overloading. Whereas Java requires explicit specification of multiple same-named functions with different signatures, the same can be accomplished in Python with a single function that includes optional arguments with default values if not specified by the caller.

Single vs. double quotes. Whereas the use of single quotes vs. double quotes has significance in Java, they can be used interchangeably in Python (but no, it won’t allow beginnning the same string with a double quote and trying to end it with a single quote, or vice versa!).

Getters and setters (not!). Getters and setters in Python are superfluous; rather, you should use the ‘property’ built-in (that’s what it’s for!). In Python, getters and setters are a waste of both CPU and programmer time.

Classes are optional. Whereas Java requires every function to be defined in the context of an enclosing class definition, Python has no such requirement.

Indentation matters… in Python. This bites many a newbie Python programmer.

The Big Picture

An expert knowledge of Python extends well beyond the technical minutia of the language. A Python expert will have an in-depth understanding and appreciation of Python’s benefits as well as its limitations. Accordingly, here are some sample questions that can help assess this dimension of a candidate’s expertise:

###Q: What is Python particularly good for? When is using Python the “right choice” for a project?

Although likes and dislikes are highly personal, a developer who is “worth his or her salt” will highlight features of the Python language that are generally considered advantageous (which also helps answer the question of what Python is “particularly good for”). Some of the more common valid answers to this question include:

便于使用和重构,感谢Python灵活的语法,让它在快速建模时非常有用。

更多简洁的代码,再次感谢Python的语法和众多Python库。(distributed freely with most Python language implementations).

A dynamically-typed and strongly-typed language, offering the rare combination of code flexibility while at the same time avoiding pesky implicit-type-conversion bugs.

免费且开源,还要我说更多吗?

With regard to the question of when using Python is the “right choice” for a project, the complete answer also depends on a number of issues orthogonal to the language itself, such as prior technology investment, skill set of the team, and so on. Although the question as stated above implies interest in a strictly technical answer, a developer who will raise these additional issues in an interview will always “score more points” with me since it indicates an awareness of, and sensitivity to, the “bigger picture” (i.e., beyond just the technology being employed). Conversely, a response that Python is always the right choice is a clear sign of an unsophisticated developer.

###Q: Python语言的有哪些缺陷?

对于初学者来说,如果你很了解一门语言,你就应该知道它的缺点,因此回答如“他没有任何我不喜欢的东西”或者“它没有缺点”都非常telling indeed。

这个问题两个最常见的有效答案(绝不是详细列表)是:

全局解释器锁(GIL)。 CPython(最常用的Python实现)是非完全线程安全的。为了支持多线程的Python程序,当前线程必须保持CPython提供的一个全局锁,之后才能安全地访问python对象。其结果是,不管有多少线程或处理器存在,在任意时刻只有一个线程被执行。相比较而言,值得注意的是,之前讨论的PyPy实现提供了对海量micro-threads并发的支持。

执行速度。 Python可能比编译语言要慢,因为它是被解释的。 (嗯,有点慢。查看之前我们针对这个问题的讨论。)
包起来

##总结

本文中所列举的问题和技巧可以帮助你识别真正的python高手。我们希望在你寻找顶尖python开发者的时候,这些问题和技巧能成为一个“从谷壳分离麦子”的有用工具。然而,要记住,这些仅仅应该是作为工具被纳入你的整体招聘工具箱和战略中。

另外,对于那些可能会错误地阅读本指南,希望学习如何捕捉爬行动物(对不起,伙计,一类错误的蟒蛇!)的人,我们推荐你来弗罗里达州野生动物基金会的Python挑战赛。

[翻译]7个经典python面试题

发表于 2015-05-19 | 分类于 python

原文在这里toptal

##下面的代码输出什么?

list = ['a', 'b', 'c', 'd', 'e']
print list[10:]

上面的代码输出[],并且不会导致IndexError错误

跟你想的一样,当取列表元素的时候,如果索引值超过了元素的个数(例如在上面的列表中,取list[10])将会导致IndexError错误。但是,取一个列表的切片的时候,如果起始索引超过了元素个数,将不会引起IndexError错误,仅返回一个空列表。

这一特性将会导致一些非常难于追踪的bug,因为在运行时根本没有错误产生。

##下面的代码在Python2中的输出是什么?解释你的答案

def div1(x,y):
    print "%s/%s = %s" % (x, y, x/y)

def div2(x,y):
    print "%s//%s = %s" % (x, y, x//y)

div1(5,2)
div1(5.,2)
div2(5,2)
div2(5.,2.)

另外,在Python3中上面的代码的输出有何不同(假设代码中的print语句都转化成了Python3中的语法结构)?

在Python2中,代码的输出是:

5/2 = 2
5.0/2 = 2.5
5//2 = 2
5.0//2.0 = 2.0

默认情况下,如果两个操作数都是整数,Python2默认执行整数运算。所以,5/2 结果是2,而5./2结果是2.5

注意你可以通过下面的import语句来覆盖Python2中的这一行为

from __future__ import division 

还要注意“双斜杠”(//)操作符将会一直执行整除,忽略操作数的类型。这就是为什么5.0//2.0即使在Python2中结果也是2.0

但是在Python3并没有这一行为。两个操作数都是整数时,也不执行整数运算。在Python3中,输出如下:

5/2 = 2.5
5.0/2 = 2.5
5//2 = 2
5.0//2.0 = 2.0

##下面代码的输出是什么?请解释你的答案

def extendList(val, list=[]):
    list.append(val)
    return list

list1 = extendList(10)
list2 = extendList(123,[])
list3 = extendList('a')

print "list1 = %s" % list1
print "list2 = %s" % list2
print "list3 = %s" % list3

如何修改函数ExtendList的定义才能产生我们希望的行为?

输出为:

list1 = [10, 'a']
list2 = [123]
list3 = [10, 'a']

很多人会错误地预计list1等于[10],list3等于['a'],认为extendList函数的list参数在每一次函数被调用时都会被设置为默认值[]

但是,真实的情况是,默认的list只在函数定义的时候被创建一次。之后不指定list参数地调用extendList函数时,使用的都是同一个list。这是因为带默认参数的表达式是在函数定义的时候被计算的,而不是在函数调用时。

所以,list1和list3都是在操作同一个默认list,而list2是在操作它自己创建的一个独立的list(将自己的空list作为参数传递过去)

extendlist的定义可以这样定义来达到我们预期的效果:

def extendList(val, list=None):
    if list is None:
        list = []
    list.append(val)
    return list

调用修改后的函数,输出是:

list1 = [10]
list2 = [123]
list3 = ['a']

##下面代码的输出是什么?请解释你的答案

class Parent(object):
    x = 1

class Child1(Parent):
    pass

class Child2(Parent):
    pass

print Parent.x, Child1.x, Child2.x
Child1.x = 2
print Parent.x, Child1.x, Child2.x
Parent.x = 3
print Parent.x, Child1.x, Child2.x

输出为:

1 1 1
1 2 1
3 2 3

让很多人感到疑惑和惊讶的是,最后一行的输出竟然不是3 2 1而是3 2 3. 为什么修改了Parent.X的值会影响到Child2.x,但是同时又没有改变Child1.x的值呢?

这个问题的关键在于,在python中,类中的变量在内部被当作字典处理。如果一个变量名在当前类的字典中没有被发现,系统将会在这个类的祖先(例如,它的父类)中继续寻找,直到找到为止(如果一个变量名在这个类和这个类的祖先中都没有,那么将会引发一个AttributeError错误)

因此,在父类中将变量x赋值为1,那么x变量将可以被当前类和所有这个类的子类引用。这就是为什么第一个print语句输出为1 1 1.

接下来,如果它的子类覆盖了这个值(例如, 当我们执行Child1.x = 2),那么这个变量的值仅仅在这个子类中发生了改变。这就是为什么第二个print语句输出1 2 1

最后,如果父类改变了这个变量的值(例如,我们执行Parent.x = 3),所有没有覆盖这个参数值的子类(在这个例子中覆盖了参数的就是Child2)都会受到影响,这就是为什么第三个print语句的输出为3 2 3

##下面代码的输出是什么?请解释你的答案

def multipliers():
    return [lambda x : i * x for i in range(4)]

print [m(2) for m in multipliers()]

怎么修改multipliers的定义才能达到期望的效果?

上面代码的输出是[6, 6, 6, 6](不是[0, 2, 4, 6]).

原因是Python的闭包是延迟绑定(late binding)的。这表明在闭包中使用的变量直到内层函数被调用的时候才会被查找。结果是,当调用multipliers()返回的函数时,i参数的值会在这时被在调用环境中查找。所以,无论调用返回的哪个函数,for循环此时已经结束,i等于它最终的值3。因此,所有返回的函数都要乘以传递过来的3,因为上面的代码传递了2作为参数,所以他们都返回了6(即,3 * 2)

(顺便提一句,正如在书《The Hitchhiker’s Guide to Python》中提出来的一样, 有一种广泛传播的误解认为这个问题和lambda表达式有关,事实并非如此。通过labda表达式产生的函数并没有什么特别之处,使用普通的def定义的函数的行为和lambda表达式产生的函数的行为是一样的.)

下面是一些可以绕过这个问题的方法。

方法一是像下面一样使用Python的生成器(generator)

def multipliers():
     for i in range(4): yield lambda x : i * x 

另一个方法是创造一个闭包,通过使用一个默认参数来立即绑定它的参数

def multipliers():
    return [lambda x, i=i : i * x for i in range(4)]

或者,你也可以使用functools.partial函数:

from functools import partial
from operator import mul

def multipliers():
    return [partial(mul, i) for i in range(4)]

##考虑下面的代码片段:

1. list = [ [ ] ] * 5
2. list  # output?
3. list[0].append(10)
4. list  # output?
5. list[1].append(20)
6. list  # output?
7. list.append(30)
8. list  # output?

第2,4,6,8行的输出是什么?解释你的答案.

输出如下:

[[], [], [], [], []]
[[10], [10], [10], [10], [10]]
[[10, 20], [10, 20], [10, 20], [10, 20], [10, 20]]
[[10, 20], [10, 20], [10, 20], [10, 20], [10, 20], 30]

下面是解释:

第一行的输出凭直觉就能知道,很容易理解。即:list = [ [ ] ] * 5创建了一个元素是5个列表的列表。

但是,这里要理解的关键是,list = [ [ ] ] * 5并没有创建一个包含5个不同列表的列表。创建的这个列表里的5个列表,是对同一个列表的引用(a a list of 5 references to the same list)。理解了这些,你就能更好地理解余下的输出。

list[0].append(10)将数字10添加到第一个列表。但是由于5个列表是对同一个列表的引用,所以输出是[[10], [10], [10], [10], [10]]。

同样的,list[1].append(20)将20追加到第二个列表。但是同样,由于这5个列表引用同一个列表,所以输出:[[10, 20], [10, 20], [10, 20], [10, 20], [10, 20]].

相比之下, list.append(30)是将一个全新的元素追加到“外层”的列表,所以产生了这样的输出:[[10, 20], [10, 20], [10, 20], [10, 20], [10, 20], 30].

##有一个拥有N个元素的列表,用一个列表解析式生成一个新的列表,元素的值同时满足以下条件:

(a) 偶数,以及
(b) 在原列表中,索引为偶数

例如,如果list[2]的值是偶数,那么这个元素应该也被包含在新列表中,因为它在原列表中的索引也是偶数(即 2). 但是, 如果list[3]是偶数,那这个值不应该被包含在新列表中,因为它在原列表中的索引是一个奇数。

一个简单的解法如下:

[x for x in list[::2] if x%2 == 0]

例如,给出下面的列表:

#        0   1   2   3    4    5    6    7    8
list = [ 1 , 3 , 5 , 8 , 10 , 13 , 18 , 36 , 78 ]

列表解析式[x for x in list[::2] if x%2 == 0] 会生成:

[10, 18, 78]

这个表达式首先取列表中索引是偶数的数字,然后过滤掉所有的奇数.

部署multi-region openstack环境

发表于 2015-05-19 | 分类于 openstack

Icehouse默认的region是RegionOne。因为默认region的存在,无论是在命令行,还是在web上,我们都不需要指定region。在命令行中你还可以用os-region-name来指定region,在web中你就根本找不到与region相关的东西。

因为这样,很多人都不了解region的概念,如果你已经使用过openstack,并且不知道在哪看到了可以设置多region这样一件事,所以想自己部署一个看看,那么你可以把这篇文章读完。

因为只是一个实验,我们怎么简单怎么来。网上有很多快速部署openstack环境的教程,首先你需要按照教程部署两套完整的openstack环境。有了这两套环境,我们稍微改一下配置即可。

##增加endpoint

选择一台机器作为RegionOne,另一台则为RegionTwo。我们需要在RegionOne上增加Regiontwo上的service的endpoint。

如图,可以看到Horizon,Keystone和Swift是公用的,我们只需要增加这些服务之外的服务的endpoint

如图我们需要增加cinder,ec2,glance,neutron,nova的endpoint。添加endpoint的命令是:

keystone endpoint-create --region RegionTwo 
                         --service <service> 
                          --publicurl <public-url>
                         --adminurl <admin-url>
                         --internalurl <internal-url>

这样添加好了之后,工作就完成一半了。

如果就这样打开RegionOne的web,会发现在页面上出现了一个之前没有的选择框,可以选择RegionOne或者RegionTwo,但是选了Regiontwo之后,按概况或者云主机之类的按钮,会出现各种无权限的错误,好蛋疼。其实这时候我们的web还没有配置好。

##配置horizon

打开文件

vim /etc/openstack-dashboard/local_settings.py

找到

# For multiple regions uncomment this configuration, and add (endpoint, title).
# AVAILABLE_REGIONS = [
#     ('http://cluster1.example.com:5000/v2.0', 'cluster1'),
#     ('http://cluster2.example.com:5000/v2.0', 'cluster2'),
# ]

去掉注释,改成这样:

# For multiple regions uncomment this configuration, and add (endpoint, title).
AVAILABLE_REGIONS = [ 
     ('http://10.10.7.208:5000/v2.0', 'RegionOne'),
     ('http://10.10.7.200:5000/v2.0', 'RegionTwo'),
]

我的两台环境是10.10.7.208和10.10.7.200,你需要改成你的环境的ip。后面的5000端口不需要改,5000是keystone监听的端口,剩下的都不需要改。

改完之后,保存,重启web

service apache2 restart
#这里也是,如果你不是用的apache,请改成你重启web的方式

这时候再登录就一切OK啦!

右上角的region控制你登录的是哪个region,中间的那个是用户自由切换的用的。

让mac的终端实现克隆会话功能

发表于 2015-05-19 | 分类于 mac

win上的securecrt和xshell都支持克隆回话,这样ssh到别的主机就不需要每次都输入密码。mac版的securecrt非常难用,网上找到方法可以让mac自带的终端实现克隆会话的功能,如下。

cd ~/.ssh
touch config

在config文件中写入下面的内容:

Host *
    ControlMaster auto
    ControlPath ~/.ssh/%h-%p-%r
    ControlPersist yes

第一次登陆输入密码后,第二次登陆就不需要密码了。每次登陆,会在~/.ssh中建立一个soket文件,下次用相同用户名,端口,主机名进行连接就会自动复用

openstack-horizon管理页面屏蔽

发表于 2015-05-15 | 分类于 openstack

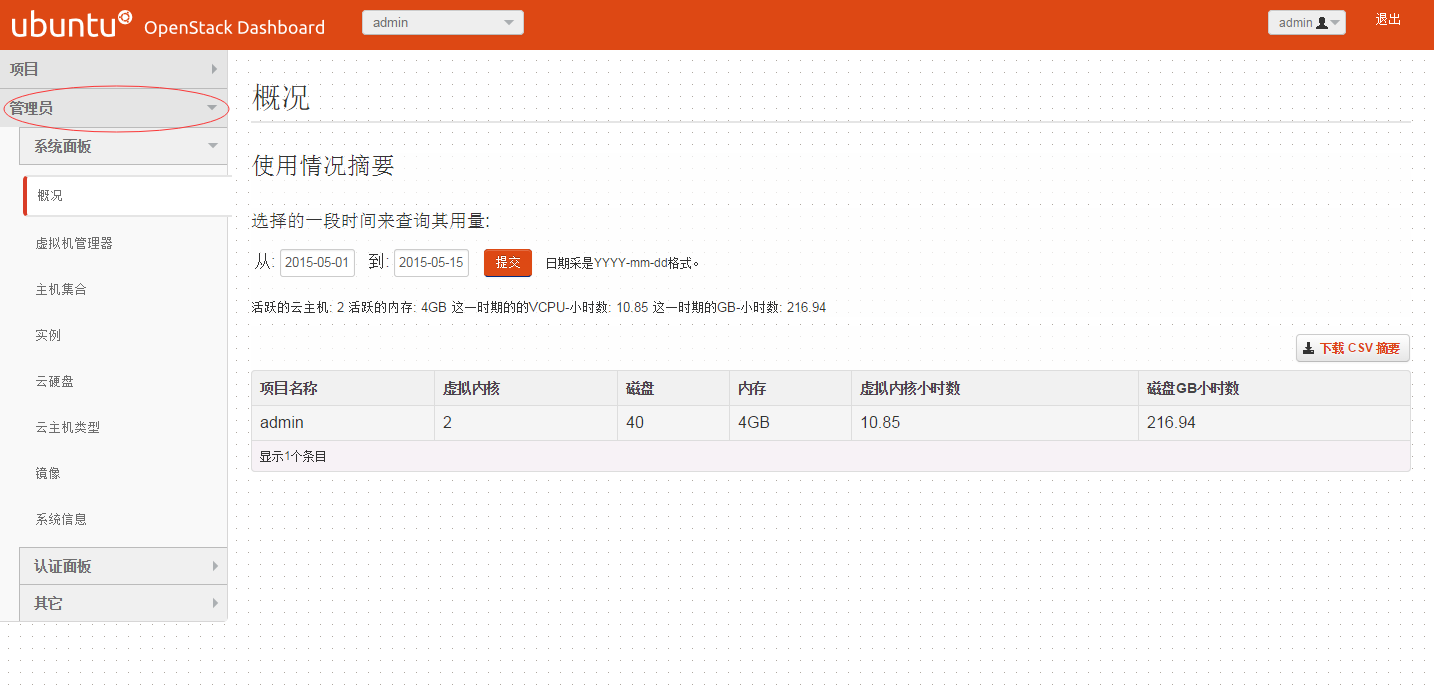
openstack的用户有role的属性,horizon根据用户的role不同展示不同的页面,如果role为admin,除了项目页面外,还会展示管理员页面。

这是很正常的逻辑,一个项目一个管理员,其他人的role都是member。但是实际开发中可能遇到这样的问题:horizon提供的功能很简单,可能不能满足你的要求,于是你使用了opencontrail来补充,但是,登录opencontrail的时候要求用户具有admin权限,我们必须要给所有人都加上admin权限,而opencontrail又缺乏管理项目和用户的功能,还是需要使用openstack,这样诸多拥有admin权限的人都能看到管理员界面,如果对系统不了解,误删了一些项目或者用户,会让你排查到抓狂。

怎么解决这个问题呢?我的想法是,只有用户名和role均为admin的用户才能看到管理页面,role满足但是用户名不满足的用户只能看到project。据此得到的解决方案有两种,下面分别叙述。

##方法一:openstack_auth的permission

horizon左侧显示的导航栏是一个个dashboard,这些dashboard里面的子项目称为panel,代码中判断显示或者不显示一个dashboard取决于用户的permission,那permission在哪里定义呢?在openstack_auth这个模块中。

/usr/lib/python2.7/dist-packages/openstack_auth/backend.py

backend.py文件中的类KeystoneBackend中的函数get_all_permissions中定义了用户的权限:

def get_all_permissions(self, user, obj=None):
    """Returns a set of permission strings that this user has through
       his/her Keystone "roles".

       The permissions are returned as ``"openstack.{{ role.name }}"``.
    """
    if user.is_anonymous() or obj is not None:
        return set()
    # TODO(gabrielhurley): Integrate policy-driven RBAC
    #                      when supported by Keystone.
    #print user.username
    role_perms = set(["openstack.roles.%s" % role['name'].lower()
                      for role in user.roles])
    service_perms = set(["openstack.services.%s" % service['type'].lower()
                      for service in user.service_catalog])
    return role_perms | service_perms

可以看到我们有的权限是role_perms和service_perms,不妨将它们打印出来看一下,倒数第二行加个打印:

print role_perms | service_perms

内容为:

set([u'openstack.services.compute',  u'openstack.services.orchestration', u'openstack.services.identity', u'openstack.roles
.keystoneserviceadmin', u'openstack.services.network', u'openstack.roles.keystoneadmin', u'openstack.services.volume', u'openstack.services.ec2', u'openstack.roles.admin', u'openstack.services.image'])

如果我们想通过用户名来限制dashboard和panel的显示,那就要增加name_perm这个字段,修改后的函数如下:

def get_all_permissions(self, user, obj=None):
    """Returns a set of permission strings that this user has through
       his/her Keystone "roles".

       The permissions are returned as ``"openstack.{{ role.name }}"``.
    """
    if user.is_anonymous() or obj is not None:
        return set()
    # TODO(gabrielhurley): Integrate policy-driven RBAC
    #                      when supported by Keystone.
    #print user.username
    role_perms = set(["openstack.roles.%s" % role['name'].lower()
                      for role in user.roles])
    service_perms = set(["openstack.services.%s" % service['type'].lower()
                      for service in user.service_catalog])
    name_perms = set(["openstack.username.%s" % user.username.lower()])
    return role_perms | service_perms | name_perms

这样就增加了name_perms,打印出来如下:

set([u'openstack.services.compute', u'openstack.username.youwangqiu', u'openstack.services.orchestration', u'openstack.services.identity', u'openstack.roles
.keystoneserviceadmin', u'openstack.services.network', u'openstack.roles.keystoneadmin', u'openstack.services.volume', u'openstack.services.ec2', u'openstack.roles.admin', u'openstack.services.image'])

这样只是让用户有了这个权限字段,怎么让dashboard和panel知道呢?这就要到

/usr/share/openstack-dashboard/openstack_dashboard/dashboards

这个目录下来看。

root@contrail-you:/usr/share/openstack-dashboard/openstack_dashboard/dashboards# ls
admin  __init__.py  __init__.pyc  project  router  settings

这里的admin,project,router和setting就是4个独立的dashboard,因为是限制管理员界面,很明显,应该是admin这个dashboard。

这个dashboard的类似于config文件在dashboard.py文件中

import horizon


class SystemPanels(horizon.PanelGroup):
    slug = "admin"
    name = _("System Panel")
    panels = ('overview', 'metering', 'hypervisors', 'aggregates',
              'instances', 'volumes', 'flavors', 'images',
              'networks', 'routers', 'info')

class IdentityPanels(horizon.PanelGroup):
    slug = "identity"
    name = _("Identity Panel")
    panels = ('domains', 'projects', 'users', 'groups', 'roles')        

class Admin(horizon.Dashboard):
    name = _("Admin")
    slug = "admin"
    panels = (SystemPanels, IdentityPanels)

    default_panel = 'overview'
    permissions = ('openstack.roles.admin',)


horizon.register(Admin)

可以看到显示admin这个dashboard的权限是roles为admin(permissions = ('openstack.roles.admin',)),非常容易想到我们把permission这么改不就行了:

permissions = ('openstack.username.admin','openstack.roles.admin',)

非常遗憾,如果这么修改,SystemPanels和IdentityPanels对于非admin用户名的用户都不会显示,会导致用户无法访问。那能不能单独给IdentityPanels增加permission呢?答案也是否定的,IdentityPanels继承的类并不支持permission字段,如果你硬是要给他加上支持,那应该会有很大的工作量。

其实2014版的dashboard已经解决了这个问题,在2014版里,identity是作为一个单独的dashboard存在的,这样我们就可以增加permission的内容而无需担心影响别的用户了,笔者用的是2012版

如何是好呢?我们还有一个笨方法!

在dashboard层面不能限制的话我们可以在panel层面限制啊!

以用户这个panel为例,修改

/usr/share/openstack-dashboard/openstack_dashboard/dashboards/admin/users/panel.py

将这个文件修改为:

from django.utils.translation import ugettext_lazy as _

import horizon

from openstack_dashboard.dashboards.admin import dashboard


class Users(horizon.Panel):
    name = _("Users")
    slug = 'users'
    permissions = ('openstack.username.admin',) #增加这一行


dashboard.Admin.register(Users)

其实就是增加了permission这一行,现在可以登录看一下了,你会发现用户这个子项目已经不见了,大功告成,如果要把管理员这整个dashboard搞消失,只需要将这个dashboard里的所有panel都加上permission做限制就可以了。

这个方法比较烦,但是应用了permission的思想,我比较倾向于这个方法。方法二比较简单,只需要改动一处。

##方法二:在生成页面之前

毕竟是个web,总是要生成html的,在这些html里搜索一下会发现,左边的导航栏是用horizon_nav这个函数生成的。路径如下:

/usr/lib/python2.7/dist-packages/horizon/templatetags/horizon.py

这个函数是作为参数传入到模版中去的,只要在这里修改dashboard就能让admin栏不显示

原理很简单,对非admin用户名的用户,将dashboard里的admin这个dashboard删掉,只保留project这个dashboard。当然少不了一些调试,如果你有一些django的开发经验,应该很容易搞定,修改后的horizon_nav函数如下:

@register.inclusion_tag('horizon/_accordion_nav.html', takes_context=True)
def horizon_nav(context):
    if 'request' not in context:
        return {}
    current_dashboard = context['request'].horizon.get('dashboard', None)
    current_panel = context['request'].horizon.get('panel', None)
    dashboards = []
    for dash in Horizon.get_dashboards():
        panel_groups = dash.get_panel_groups()
        non_empty_groups = []
        for group in panel_groups.values():
            allowed_panels = []
            for panel in group:
                if callable(panel.nav) and panel.nav(context):
                    allowed_panels.append(panel)
                elif not callable(panel.nav) and panel.nav:
                    allowed_panels.append(panel)
            if allowed_panels:
                non_empty_groups.append((group.name, allowed_panels))
        if callable(dash.nav) and dash.nav(context):
            dashboards.append((dash, SortedDict(non_empty_groups)))
        elif not callable(dash.nav) and dash.nav:
            dashboards.append((dash, SortedDict(non_empty_groups)))
    username = context['request'].user.username  #**new**
    if username != 'admin':  #**new**
        dashboards = [dashboard for dashboard in dashboards if dashboards[0].slug != 'admin']    #**new**
    return {'components': dashboards,
            'user': context['request'].user,
            'current': current_dashboard,
            'current_panel': current_panel.slug if current_panel else '', 
            'request': context['request']}

NOTE:注意修改之后务必重启web

有不明白之处,可以联系:wq_you@163.com

##参考资料

Horizon Is Easy, Horizon Is Complex

pip升级安装过的包

发表于 2015-05-14 | 分类于 python

不知道为什么pip –help不显示升级安装包的命令

其实很简单,加上-U选项就是升级这个模块

for example:

pip install -U setuptools

这个操作就是升级setuptools模块

1…456…18
You Wangqiu

You Wangqiu

世之奇伟、瑰怪,非常之观,常在于险远,而人之所罕至焉,故非有志者不能至也

171 日志
21 分类
24 标签
GitHub 知乎 E-Mail
© 2018 You Wangqiu
由 Hexo 强力驱动
主题 - NexT.Muse